

Nothing beats the smell of a peach cobbler bubbling away in the oven — golden crust, sweet sticky fruit, a little cinnamon in the air. This version keeps things beautifully simple: Bisquick does the heavy lifting, and canned peaches mean you can pull this off on any given weeknight, peach season or not. No peeling, no fussing, no waiting for anything to ripen.
Why This Recipe Works
The beauty of this cobbler is in the layering. Canned peaches go into the dish first — syrup and all — then the Bisquick batter is poured right on top without any stirring. In the oven, those two layers shift and mingle in the best way: the batter bakes up through the fruit, the bottom turns jammy and tender, and the top goes crisp and golden brown. The result is that classic cobbler texture that has made this a Southern staple for decades.
Canned peaches are already sweetened and softened, which means you skip the sugar-coating and macerating steps that fresh peaches require. And Bisquick — which has been in American kitchens since the 1930s — gives you a tender, biscuit-like crust without measuring out flour, baking powder, and salt separately. Together, these two pantry staples make a genuinely foolproof dessert.
Peaches canned in heavy syrup give you a richer, sweeter filling with more sauce. Peaches in light syrup or 100% juice are a bit less sweet and slightly thinner — a good choice if you prefer a more restrained sweetness. Both work beautifully. The syrup amount you keep in the dish also affects the final texture (more on that in the steps).
Southern cobbler has roots going back to the American frontier, when settlers adapted English steamed puddings using whatever local ingredients they had. Bisquick brought that tradition into the modern pantry, and this particular pour-and-bake formula has been showing up at church potlucks and Sunday dinners ever since. If you love the idea of effortless pantry desserts, you will also want to bookmark the lemon blueberry dump cake that comes together with just 3 ingredients — same zero-fuss philosophy, totally different flavor profile.
Ingredients
Eight simple ingredients. Most of them are probably already in your pantry right now.
- Sub: Fresh peaches work beautifully in summer. Use about 4 cups sliced and peeled, plus 3 tbsp sugar and 3 tbsp water to compensate for the missing syrup. For frozen, thaw and drain thoroughly before using.
- Sub: No Bisquick on hand? Whisk together 2 cups all-purpose flour + 1 tbsp baking powder + 1 tsp salt + 2 tbsp cold vegetable shortening (cut in until crumbly). Gluten-Free Bisquick also works cup-for-cup.
- Sub: Salted butter is fine — no need to adjust anything else. For dairy-free, melted coconut oil or a plant-based butter both work well. The crust will be slightly crispier with coconut oil.
- Sub: Reduce to ¾ cup if your peaches are in heavy syrup and you prefer a less sweet result. Brown sugar adds a lovely deeper, almost caramel flavor. Coconut sugar works but will make the crust a shade darker.
- Sub: 2% milk works just as well. For dairy-free, use unsweetened oat milk or almond milk — the crust will be slightly less rich but still delicious and golden.
- Sub: Almond extract (use ½ tsp — it is much more potent) adds a lovely Southern depth. Vanilla bean paste is an excellent upgrade here if you have it.
- Sub: Apple pie spice or pumpkin pie spice work beautifully here for a more complex warmth. Cardamom (¼ tsp) adds a gorgeous floral note if you enjoy it.
- Sub: Entirely optional but adds a subtle warmth that rounds out the cinnamon. Freshly grated nutmeg is noticeably more aromatic than pre-ground. Skip it entirely if you prefer.
Equipment You Need
No special tools required — this is genuinely an everyday kitchen recipe.
- 9×13-inch baking dish — glass or ceramic are ideal; metal pans conduct heat faster and may need 5 fewer minutes
- Medium mixing bowl
- Whisk or wooden spoon
- Can opener
- Measuring cups and spoons
- Small saucepan or microwave-safe bowl — for melting the butter
- Toothpick or cake tester — for checking doneness
- Oven mitts
That is genuinely everything. The whole setup takes about five minutes, which means most of your time is hands-off while the oven does its thing.
Step-by-Step Instructions
Set your oven to 375°F (190°C). While it heats up, grease a 9×13-inch baking dish with a thin coating of butter or a quick spray of nonstick cooking spray. Pay attention to the corners and sides — those are the spots most likely to stick.
💡 Tip
Open both cans and pour the peaches — along with their syrup — directly into the greased baking dish. Spread them into an even layer with a spoon. Do not drain the syrup unless you specifically prefer a thicker, less saucy cobbler (see the tip below for guidance).
💡 Tip
In a medium bowl, combine the Bisquick mix, melted butter, sugar, milk, and vanilla extract. Stir just until blended — a few small lumps are completely fine. The most important thing here is not to overmix: overworking the batter develops gluten and leads to a tougher, denser crust.
💡 Tip
Pour the batter evenly over the peaches. Do not stir — simply let it settle naturally. Then sprinkle the ground cinnamon and nutmeg evenly across the surface of the batter. As the cobbler bakes, the spices will bloom and toast into the top crust beautifully.
💡 Tip
Place the baking dish on the center rack of your preheated oven and bake for 45 to 50 minutes. The cobbler is done when the top is a deep golden brown and a toothpick inserted into the center of the crust comes out clean. You will see the edges bubbling — that is exactly what you want to see.
💡 Tip
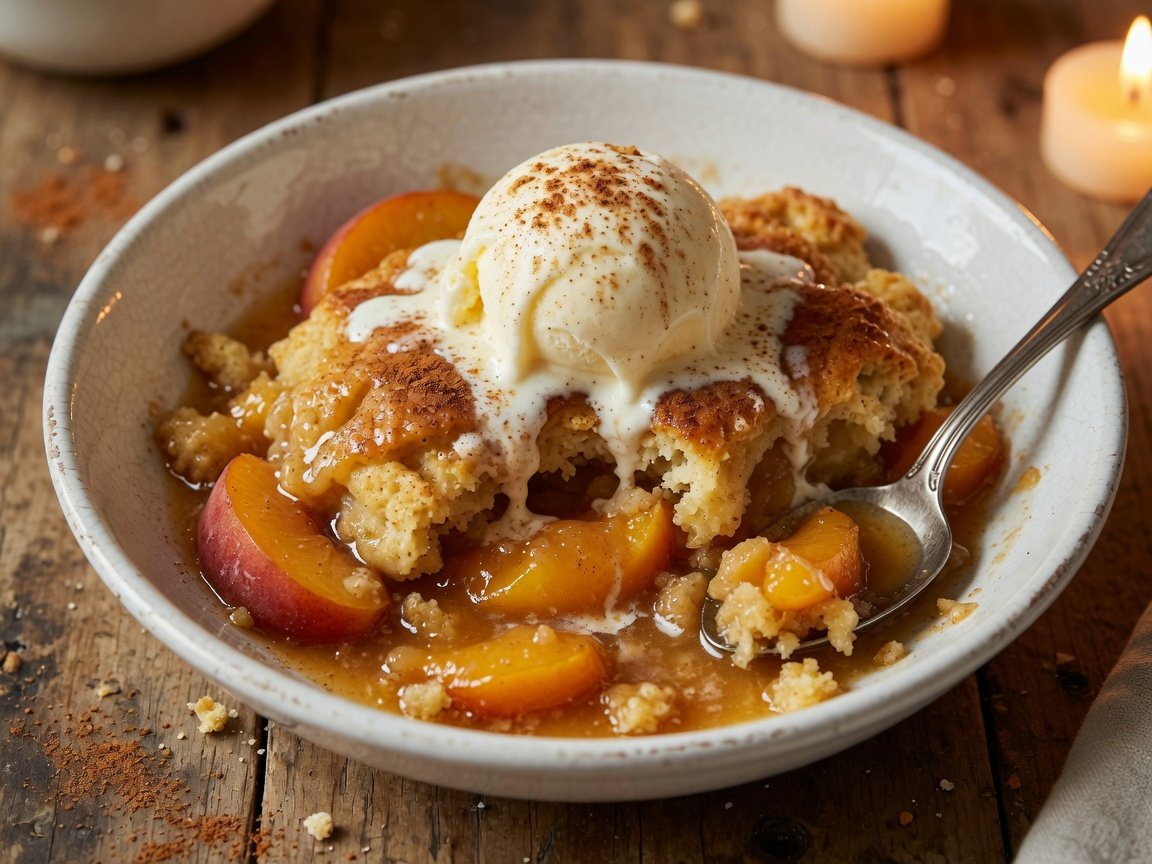
Remove the cobbler from the oven and let it sit, uncovered, for at least 15 to 20 minutes before scooping. The filling is molten-hot straight out of the oven and needs time to set slightly so it scoops cleanly rather than pouring out as liquid. Serve warm with a generous scoop of vanilla ice cream or a cloud of whipped cream.
💡 Tip
Kitchen Timers
Use these right here while you cook — no phone app needed. Start the bake timer when the dish goes into the oven, and the cooling timer once you pull it out.
Browser notifications fire when each timer reaches zero if permission is granted. Otherwise the display turns bold to alert you.
Nutrition Information
Per serving — 1/8 of a 9×13 dish (approximately 170 g). Values are estimates based on standard ingredient brands and will vary slightly depending on the specific peaches and Bisquick used.
| Nutrient | Per Serving | % Daily Value* |
|---|---|---|
| Calories | 365 kcal | — |
| Total Fat | 13 g | 17% |
| Saturated Fat | 7 g | 35% |
| Trans Fat | 0 g | — |
| Cholesterol | 32 mg | 11% |
| Sodium | 420 mg | 18% |
| Total Carbohydrates | 58 g | 21% |
| Dietary Fiber | 1 g | 4% |
| Total Sugars | 38 g | — |
| Protein | 4 g | 8% |
| Vitamin C | 3 mg | 3% |
| Calcium | 80 mg | 6% |
| Iron | 1.2 mg | 7% |
* Percent Daily Values are based on a 2,000-calorie diet.
Recipe Variations
Same base recipe, a few tweaks depending on who is sitting at your table or what you have on hand.
Swap the butter for melted coconut oil or vegan butter, and use unsweetened oat milk or almond milk in place of whole milk. The crust will be slightly crispier and a touch less rich, but still golden and thoroughly satisfying. Original Bisquick mix is already dairy-free in dry form, so no worries there.
Use peaches packed in 100% fruit juice instead of syrup and reduce the granulated sugar to ¾ cup. The difference in sweetness is noticeable in a good way — the peach flavor comes forward more and the whole cobbler tastes a bit brighter. You can also replace up to half the sugar with a baking-friendly sweetener like erythritol for a lower-glycemic option.
Double the cinnamon to 1 teaspoon, add ¼ teaspoon cardamom, a pinch of ground ginger, and a tiny pinch of cayenne (just enough to lift the other spices — you will not taste heat). This version makes the whole house smell incredible and is perfectly suited to a cool evening in fall or winter.
For a richer, tangier cobbler, soften 4 oz of cream cheese, mix it with 2 tablespoons of powdered sugar, and dollop it in spoonfuls over the peach layer before pouring the Bisquick batter on top. As it bakes, those cream cheese pockets become creamy, slightly tangy surprises in every scoop. For a fully developed version of this approach, the cream cheese peach cobbler recipe is well worth trying — it takes the idea even further.
Use a 10-inch or 12-inch cast iron skillet in place of the 9×13 dish. Cast iron conducts heat differently — the bottom gets crispier and the top browns faster. Start checking at the 35-minute mark. The skillet goes straight from oven to table, which makes for a gorgeous rustic presentation. Serve it right in the pan with a big spoon and let everyone scoop their own portion.
Chef Tips for the Best Results
The syrup is where most of the flavor lives. Keep it all in for a classic juicy cobbler, or drain about half if you prefer a thicker filling. Draining all of it leaves the peach layer too dry and the finished cobbler much less satisfying.
Just let the batter settle over the peaches without any mixing. The natural layering is exactly what creates the cobbler texture — soft fruit beneath, tender and slightly crisp crust above. Stirring collapses that structure before it even has a chance to form.
Fresh from the oven, the filling is liquid lava. Fifteen to twenty minutes of resting lets it set just enough to scoop cleanly. Twenty minutes is genuinely better than fifteen. The crust also firms up slightly during the rest, improving the texture considerably.
Ovens vary more than the dials suggest. If yours runs hot, the top can brown before the center sets. Check at 38–40 minutes — if the top is already very dark but the center jiggles when you nudge the pan, tent loosely with foil and continue baking. A toothpick through the crust into the center should come out clean, not wet.
Canned peaches vary in quality and sweetness by brand. If yours taste a little flat, a small squeeze of fresh lemon juice over the fruit layer before adding the batter can brighten everything noticeably. A tiny pinch of salt on the peaches amplifies the flavor the same way it does in any fruit preparation.
Storage, Reheating & Serving
How to Store
- Room temperature: Up to 2 hours after baking (the filling contains dairy, so do not leave it out longer)
- Refrigerator: Cover tightly with plastic wrap or foil; keeps well for up to 3 days
- Freezer: Transfer to an airtight container; freezes well for up to 3 months. Thaw overnight in the refrigerator before reheating.
Reheating
- Microwave (single serving): 45–60 seconds on high. Cover loosely with a damp paper towel to prevent the crust from drying out.
- Oven (full dish): Cover with foil and warm at 325°F for 15–20 minutes. Remove the foil for the last 5 minutes to re-crisp the top.
- Air fryer (single portion): 325°F for 5–7 minutes — surprisingly effective for reviving the crust texture without making the filling too hot too fast.
Serving Ideas
- Vanilla ice cream — the Southern classic, and impossible to argue with
- Fresh whipped cream with a light dusting of cinnamon
- A slow pour of heavy cream around the scoop (very old-fashioned, very good)
- Greek yogurt for something slightly tangy and a bit lighter
- Warm salted caramel sauce drizzled over the top for an indulgent finish
Sweet iced tea is the classic Southern pairing — cold, lightly sweet, absolutely right. For something warm, a cup of chai or spiced apple cider plays beautifully off the cinnamon in the cobbler. If you are serving this at a dinner party, a lightly sweet Moscato or a peach Bellini is a very happy match.
Troubleshooting Common Problems
Frequently Asked Questions
Your Notes & Rating
Rate this recipe
Personal cooking notes
Jot down your tweaks, swaps, and reminders for next time. Notes are saved in your browser and will be here when you come back.