

Lemon Blueberry Dump Cake: Easy 3-Ingredient Recipe in Minutes
You know how sometimes the simplest things turn out absolutely amazing? This is that dessert. Three main ingredients, five minutes of prep, and your oven does the rest. The tart lemon playing off those sweet, jammy blueberries underneath a crispy buttery crust — it’s genuinely a little bit of kitchen magic.
About This Recipe
Dump cakes have been bringing joy to American kitchens since the 1960s, right around the time convenience foods gave home cooks permission to make something genuinely delicious without spending all afternoon in the kitchen. The idea is beautifully simple: layer your ingredients, slide the dish into the oven, and let the heat do the work. No creaming butter, no folding egg whites, no timing the mixer.
And this lemon blueberry version? It’s one of the very best. The secret is the balance of flavors. Blueberry pie filling brings deep, jammy sweetness, and the fresh lemon — both the juice and the zest — cuts straight through and lifts everything up. That brightness is what takes this from “pretty good” to “people-asking-for-your-recipe-good.” If you love the simplicity of dump cakes but want something even more straightforward with pure berry flavor, this easy 3-ingredient blueberry dump cake is a beautiful side-by-side comparison — same method, just minus the lemon for a deeper, more classic berry dessert.
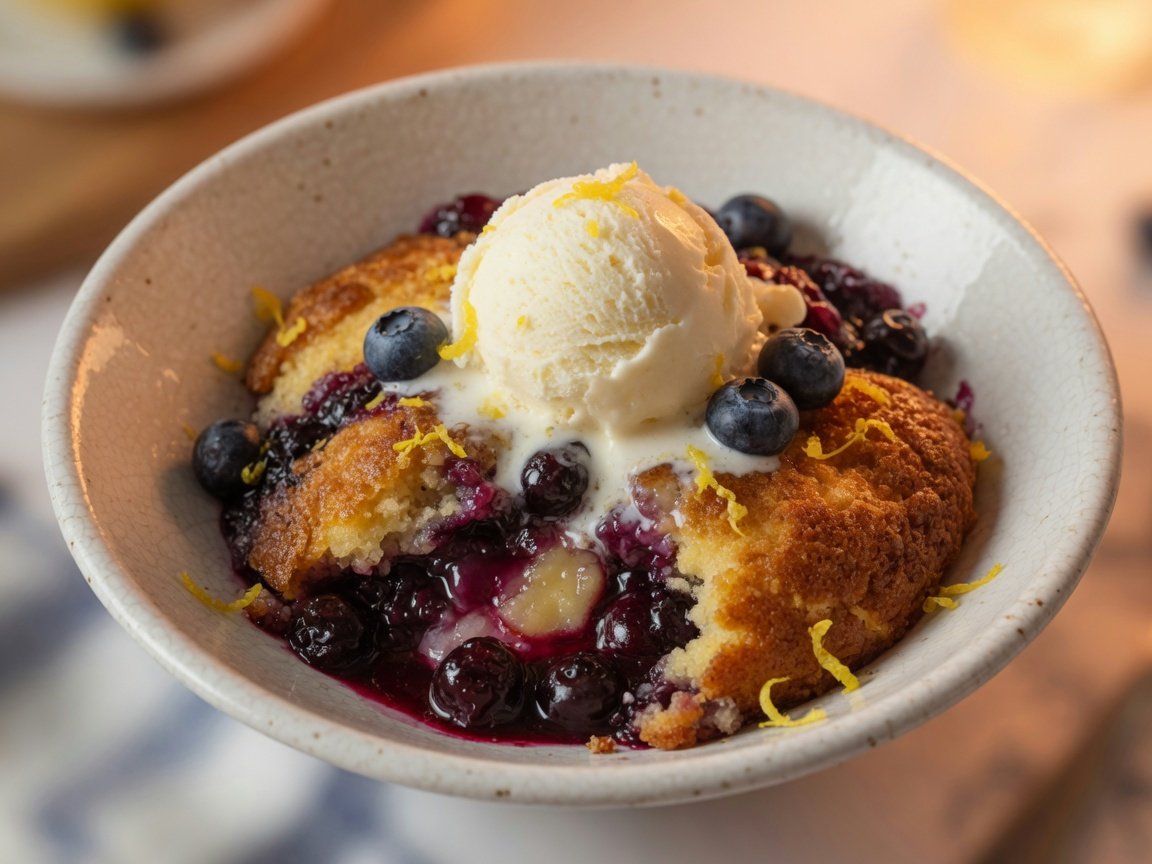
The texture is the real treat here. The dry cake mix and melted butter bake together into an incredible crispy, golden, streusel-like crust, while the fruit filling underneath gets thick and bubbling and jammy. It’s like a cobbler and a cake had a very easy, very delicious baby.
What I really love about this recipe is that it works beautifully for everything from weeknight desserts to potlucks to church socials. You can have it in the oven in under 10 minutes, and when you bring it out all golden and bubbling, people will genuinely think you fussed. Just smile and accept the compliments — you’ve earned them.
Ingredients
Heads up: this recipe is designed for one 9×13 baking dish. For best results, scale in whole-batch increments — partial boxes of cake mix are a bit awkward to measure out!
Equipment
- 9×13 inch baking dish
- Microplane or fine zester
- Chef’s knife
- Small bowl (for butter)
- Pastry brush or spray oil
- Oven thermometer (recommended)
Step-by-Step Instructions
-
Preheat your oven and prep the baking dish⏱️ ~5 min
Set your oven to 350°F (175°C) . While it heats up, grease your 9×13 inch baking dish generously with butter or non-stick spray, making sure to get into the corners. This keeps the edges from sticking and makes serving much easier.
If your oven runs hot or cold, pop in an oven thermometer. Most home ovens are off by 25°F or more — a dump cake at the wrong temperature can burn on top before the filling is done underneath. -
Add the blueberry pie filling⏱️ ~1 min
Open both cans of blueberry pie filling and pour them directly into your prepared baking dish. Use a spatula to spread the filling evenly across the entire bottom, right out to the edges. This is your base layer — an even spread means everything bakes consistently.
Room-temperature filling spreads more easily than cold. If your cans have been sitting in a chilly pantry, a quick 30 seconds in the microwave makes them much easier to work with. -
Zest and juice the lemon over the filling⏱️ ~2 min
This is where the magic starts. Zest your lemon directly over the blueberry filling — every last bit of that fragrant yellow zest goes in. Then halve the lemon and squeeze all the juice in too. Give it a gentle stir so the lemon is distributed throughout rather than pooling in one spot.
Always zest before you juice — it’s nearly impossible to zest a lemon you’ve already halved. Use a microplane or the fine side of a box grater, and get only the bright yellow part. The white pith underneath is bitter. -
Sprinkle the dry cake mix evenly over the top⏱️ ~1 min
Open the box and sprinkle the dry cake mix powder evenly over the entire fruit layer — edge to edge, corner to corner. Cover it as uniformly as you can. This is the “dump” in dump cake: resist every urge to stir. Those dry mix patches are exactly what will become your gorgeous crispy crust.
Lemon cake mix is a lovely swap here — it gives the topping a gorgeous citrus note that doubles down on the fresh lemon in the filling. White cake mix works beautifully too for a more delicate, subtle crust. -
Pour the melted butter evenly over the cake mix⏱️ ~1 min
Melt your butter completely and pour it in a slow, steady stream over the dry cake mix. Aim for a zigzag pattern — back and forth, then top to bottom — to cover as much of the surface as possible. The areas the butter reaches will bake up beautifully golden and crispy; any small dry patches will still cook, just with a slightly different texture.
Some bakers swear by thin-sliced cold butter scattered across the top instead of melted — it creates a slightly more rustic, crumblier crust. Both methods are delicious. The melted version is a bit more even; the sliced version has more texture variation. -
Bake uncovered for 45–55 minutes⏱️ 45–55 min
Slide the dish into the center rack of your preheated oven and bake uncovered. You’re looking for a deep golden-brown top with the edges visibly bubbling. If the top starts browning faster than you’d like before the 40-minute mark, tent it loosely with a piece of aluminum foil for the remaining time.
Don’t open the oven before the 40-minute mark — you’ll release heat and slow everything down. The bubbling at the edges is your best signal that the fruit filling has cooked through properly. Color alone can mislead you if your oven runs hot. -
Cool for at least 15 minutes, then serve warm⏱️ 15+ min cooling
This is the hardest part — waiting. The filling straight from the oven is like liquid lava, and it needs time to thicken up and settle. After 15 minutes of resting, scoop it warm into bowls and serve with a generous scoop of vanilla ice cream or a cloud of whipped cream. The cold against the warm is absolutely perfect.
For a prettier presentation, scoop from the center of the dish so each serving shows off both the golden crust on top and the deep purple-blue filling underneath. It looks almost too good to eat. Almost.
Kitchen Timers
Start each timer as you begin that stage — no more clock-watching!
Nutrition per Serving
Estimates based on 12 servings per 9×13 pan. Values vary by brand of cake mix and pie filling used.
| Nutrient | Per Serving | % Daily Value* |
|---|---|---|
| Calories | 330 kcal | — |
| Total Fat | 13 g | 17% |
| Saturated Fat | 8 g | 40% |
| Cholesterol | 32 mg | 11% |
| Sodium | 290 mg | 13% |
| Total Carbohydrate | 52 g | 19% |
| Dietary Fiber | 1 g | 4% |
| Total Sugars | 30 g | — |
| Protein | 2 g | 4% |
| Vitamin C | 4 mg | 4% |
*Percent Daily Values based on a 2,000 calorie diet.
Recipe Variations
This recipe is wonderfully flexible. Here are the best ways to make it your own:
The Original — and Foolproof
The recipe exactly as written above. Yellow cake mix, blueberry pie filling, fresh lemon, and butter. Serve warm with vanilla ice cream for the full experience. Already love bright lemon in your bakes? The lemon crumb cake on this site channels the same citrus energy in a completely different — and equally irresistible — format worth bookmarking.
Lemon Blueberry Cream Cheese Dump Cake
- Drop 8 oz (225g) softened cream cheese in small spoonfuls over the blueberry-lemon filling before adding the cake mix
- The cream cheese melts into the filling, creating rich, tangy pockets in every bite
- Stir 2 tablespoons of powdered sugar into the cream cheese first for a slightly sweeter result
- For a full recipe built entirely around this technique, the lemon dump cake with cream cheese is absolutely dreamy — it takes the method and runs with it
Using Fresh or Frozen Blueberries
- Replace the canned filling with 4 cups fresh or frozen blueberries (no need to thaw if frozen)
- Toss the berries with ¼ cup sugar and 2 tablespoons cornstarch before adding — this mimics the thickening agent in canned pie filling
- The filling will be slightly less thick than the canned version, which is completely normal
- Add 5 extra minutes to the bake time to ensure fresh berries break down fully
- Fresh blueberries give a brighter, less sweet result — wonderful in summer at peak berry season
Gluten-Free Version
- Swap the yellow cake mix for your favorite gluten-free yellow cake mix — most major brands now offer one
- Everything else stays exactly the same
- The top may be very slightly more crumbly — this is normal with GF mixes and is still delicious
- Double-check your blueberry pie filling label; most canned pie fillings are naturally gluten-free, but brands vary
Vegan Dump Cake
- Use a vegan yellow cake mix — check the label, as most dry cake mixes contain no eggs or dairy in their dry form
- Replace the 12 tablespoons of butter with an equal amount of melted coconut oil or vegan butter
- Coconut oil gives the top a slightly firmer, more cookie-like crust — wonderful in its own way
- Top each serving with coconut whipped cream for a fully plant-based dessert
Chef’s Tips for the Best Result
Lemon zest has 5–10× more flavor than the juice. Those tiny yellow flecks distributed throughout the filling make every single bite pop with fresh citrus brightness. Use a full lemon’s worth — and then maybe a bit more.
The golden crust forms where the butter soaks into the dry cake mix. The more evenly you distribute it, the more consistent your crispy top. Take an extra 30 seconds on the zigzag pattern — it genuinely matters.
The best doneness signal isn’t the top color — it’s the edges bubbling. You want to see that thick blueberry filling actively bubbling up around the sides before you pull it out. A browned top without the bubble means the filling isn’t done yet.
Hot dump cake is loose and soupy. Warm dump cake — after a 15-minute rest — has a filling that scoops beautifully and holds its shape. Give it the time it needs and you will be rewarded with gorgeous, layered servings.
Assemble the dish right up to the butter step, cover it tightly, and refrigerate for up to 8 hours. Pour the melted butter over just before baking. This is a genuine lifesaver for potlucks, holiday gatherings, or anytime company is coming.
Look for a pie filling with visible whole or mostly-whole berries rather than a heavily thickened, gloopy texture — you get much better fruit presence in each bite. Both Duncan Hines and Betty Crocker yellow cake mixes work beautifully as your crust.
Troubleshooting
-
⚠️ Top is dry and powderyThe cake mix didn’t get enough butter coverage. Next time, drizzle the butter in a deliberate zigzag pattern rather than pouring from one spot. A few extra tablespoons of butter also helps if you’re working with a large dish.
-
⚠️ Top burned before edges bubbledYour oven runs hot, or the rack is positioned too high. Move the dish to the center rack and tent loosely with foil after the 30-minute mark if browning is happening fast. An oven thermometer will confirm the actual temperature.
-
⚠️ Filling is too thin and wateryThis happens when using fresh or frozen fruit without cornstarch, or if you’ve used regular canned blueberries instead of pie filling (which is pre-thickened). With canned pie filling, the filling also thickens considerably as the cake cools.
-
⚠️ Not lemony enoughUse two lemons instead of one, or swap yellow cake mix for lemon cake mix. You can also add ½ teaspoon of pure lemon extract to the filling before baking for extra punch without any extra liquid.
-
⚠️ Cake mix clumped, didn’t spreadSift the dry mix through a fine sieve before sprinkling, or break up any lumps with your fingers as you go. An even layer bakes into a consistent, cohesive crust rather than thick and thin patches.
Storage & Serving
Frequently Asked Questions
-
Yes — though the result will be different. Fresh or frozen blueberries lack the thickened, syrupy consistency of pie filling. To compensate, toss 4 cups of berries with ¼ cup sugar and 2 tablespoons of cornstarch before adding them to the dish. Add about 5 extra minutes to the bake time to ensure everything cooks through.
-
No — and this is the most common first-timer mistake. You use the cake mix completely dry, straight from the box. No water, no eggs, no oil. The dry mix layers on top of the fruit and the melted butter is poured over it. The moisture from the fruit filling and the butter is what transforms it into a crust in the oven.
-
Absolutely. For an 8×8 inch dish, halve all ingredients: 1 can of pie filling, half a lemon, half a box of cake mix, and 6 tablespoons of butter. Reduce the bake time to about 35–40 minutes and watch the edges for the bubble signal.
-
White cake mix gives a more delicate, neutral crust. Lemon cake mix amplifies the citrus flavor wonderfully. Vanilla cake mix is nearly identical to yellow. Even a spice cake mix creates a surprisingly good variation with a warm cinnamon undertone that plays nicely against the blueberries — unexpected but very good.
-
Yes, without hesitation. The cake mix already contains sodium, so using salted butter gives a very slightly saltier crust — but most people find it actually enhances all the flavors. If salted butter is what you have, use it.
-
Use two lemons instead of one. Swap yellow cake mix for lemon cake mix. Add ½ teaspoon of pure lemon extract to the filling before baking. Or combine all three for a real lemon-lover’s version. If you want that tangy lemon-blueberry combination in a completely different format, the lemon blueberry cupcakes on this site deliver the same pairing as individual portions — wonderful for parties or gifting.
-
Uneven butter distribution. The golden spots are where butter soaked into the dry cake mix; the pale spots got less coverage. The zigzag pour method — back and forth across the width, then top to bottom — covers the full surface before any runs to the edges. A few extra tablespoons of butter can also close the coverage gap.
Pingback: Bisquick Peach Cobbler Canned Peaches | Easy Recipe