

Classic Scones
The flirty little secret of the pastry world — simple on the outside, wonderfully layered within. Warm, golden, and buttery, these classic scones are ready in just 35 minutes and pair beautifully with clotted cream, jam, and a pot of good tea.
Why this recipe works
Picture this: it’s a quiet afternoon, the oven is just warming up, and within 35 minutes the whole kitchen smells like something from a cozy British tearoom. That’s the scone promise — and it delivers every single time. These are the real deal: tall, well-risen, golden on top with that wonderfully tender crumb that falls apart in the best possible way when you split them open.
The secret? Cold butter, a light hand, and not overworking the dough. There’s a temptation to knead away like you’re making bread — resist it! A shaggy, rough dough baked quickly at high heat is all it takes. Whether you like them studded with plump currants, drizzled with honey for a touch of sweetness, or kept plain and perfect, this recipe has you covered.
Serve them just out of the oven, split horizontally, with a generous spoonful of clotted cream and good strawberry jam. The classic debate (cream first or jam first?) is entirely yours to settle.
Ingredients
Dry ingredients
Fat & fruit
Wet ingredients
For finishing & serving
🛒 Your shopping list
Click “Build shopping list” above to add unchecked ingredients here.
Equipment needed
Step-by-step method
Click or tap any step to mark it complete.
0 of 9 steps complete (0%)
-
Preheat the oven⏱ 2 min
Crank your oven to 425°F (220°C / Gas Mark 7). Line a large baking sheet with parchment paper. A hot oven is non-negotiable — the initial blast of heat is what creates that dramatic rise.
TipUse an oven thermometer if you have one. Most home ovens run 15–25°F off, and scones are sensitive to the difference. -
Whisk the dry ingredients⏱ 2 min
Combine the flour, baking powder, salt, and sugar in a large bowl. Give them a good whisk so the leavening is evenly distributed — no pocket of baking powder left hiding at the bottom.
-
Rub in the cold butter⏱ 3–4 min
Add the cold cubed butter to the bowl. Using just your fingertips (not your palms — they’re too warm), rub the butter into the flour by lifting and dropping the mixture until it resembles coarse breadcrumbs. A few pea-sized lumps are perfectly fine and actually great for flakiness.
TipIf your kitchen is warm, pop the bowl in the fridge for 5 minutes after this step. Cold fat = tall scones. -
Stir in the currants (if using)⏱ 1 min
If you’re going the fruity route, stir the dried currants or sultanas into the flour mixture now. Toss them in the dry mix rather than adding them later — it helps stop them sinking and keeps them evenly spread throughout.
-
Add the wet ingredients⏱ 2 min
Beat the egg into the cold buttermilk or milk. Make a well in the centre of the flour mixture and pour in most of the liquid — hold back about a tablespoon. Mix quickly with a butter knife or fork in a cutting motion until a rough, shaggy dough just comes together. If it looks dry, add the reserved liquid a splash at a time.
Key!Stop mixing the moment the dough holds together. Overworking develops gluten and turns scones tough and flat. A shaggy dough is a happy dough. -
Shape the dough⏱ 3 min
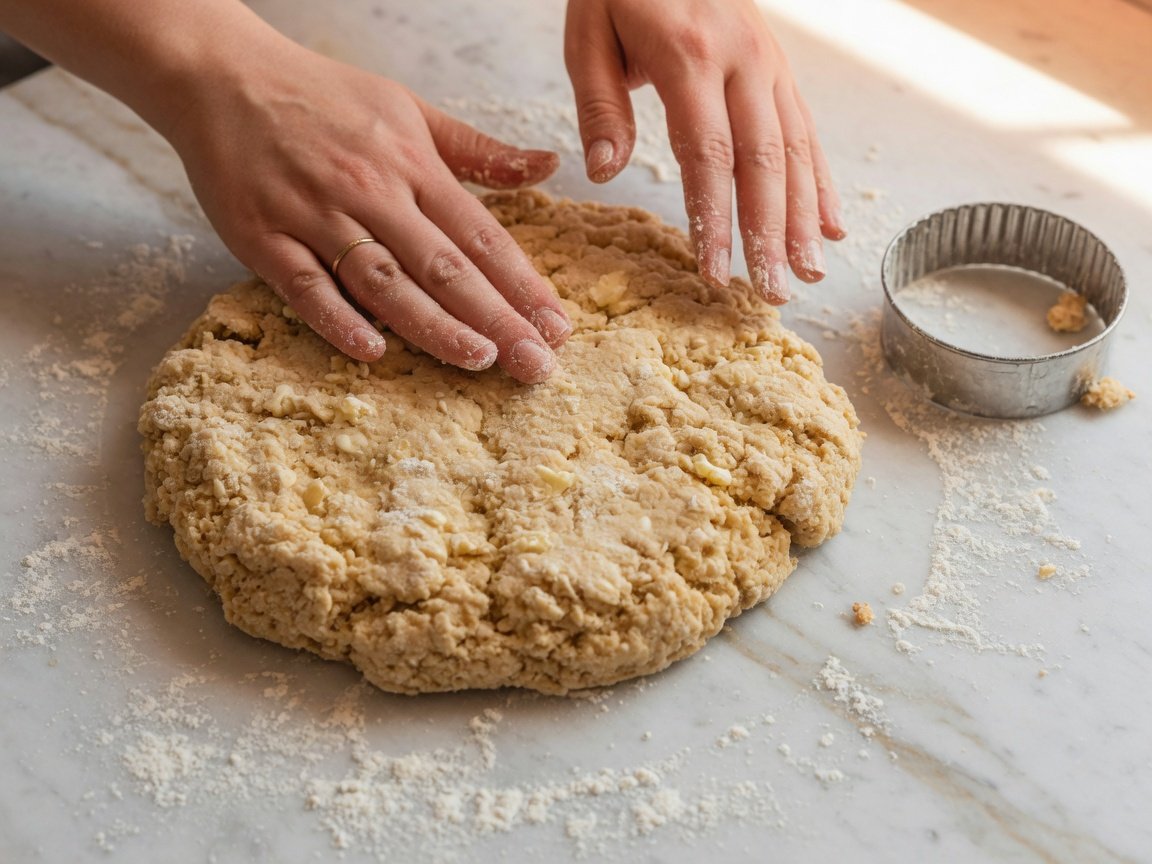
Turn the dough out onto a lightly floured surface. Pat it gently with your hands (no rolling pin!) to about 1 inch (2.5 cm) thick. Fold it once in half, then pat back to 1 inch thick. This one fold creates layers — the scone secret you don’t want to skip.
-
Cut and arrange⏱ 3 min
Use a 2½ inch (6 cm) round cutter to stamp out scones. Press straight down firmly — do not twist! Twisting seals the edges and prevents the scone from rising evenly. Place scones on the prepared baking sheet, almost touching, which encourages upward rise. Re-gather offcuts, pat gently, and cut again.
TipThe first-cut scones always rise better. Try to cut as many as possible from your first patting. -
Egg wash and bake⏱ 15 min bake
Brush the tops of the scones with the egg wash — careful not to let it drip down the sides, as this glues the edges and reduces the rise. Bake for 12–15 minutes until deep golden brown on top and well-risen. They’re done when they sound hollow when you tap the base.
-
Cool briefly and serve⏱ 5–10 min cool
Transfer to a wire rack. Give them just 5–10 minutes before serving — warm scones split more easily and the cream and jam melt into them beautifully. Split horizontally, load one half with clotted cream, then add a spoon of jam on top. Enjoy immediately, ideally with a proper cup of tea.
Serving noteThe great British debate: cream first or jam first? Devon tradition says cream first, Cornwall insists jam goes on first. Whichever side you pick, these scones are worth the argument.
Kitchen timers
Start each timer as you begin that stage. Enable browser notifications for an alert when time is up.
Notifications let you walk away from the oven without worry.
Nutrition
Per scone (plain, without toppings). Values are estimates — actual figures vary with exact ingredients and brand choices.
| Nutrient | Per scone |
|---|---|
| Calories | 235 kcal |
| Protein | 5 g |
| Carbohydrates | 32 g |
| of which sugars | 8 g |
| Total fat | 9 g |
| of which saturates | 5 g |
| Dietary fibre | 1 g |
| Sodium | 195 mg |
| Calcium | ~110 mg |
Variations
The base recipe is endlessly adaptable. Pick a variation tab to see exactly what to swap or add.
Plain & perfect
VegetarianThe base recipe as written is the classic British scone. Leave out the currants for a plain version that lets the butter flavour shine. Serve with clotted cream and strawberry jam — that’s it, that’s the whole dessert, and it needs nothing more.
- Omit currants for plain scones
- Add 1 tsp vanilla extract for a subtle sweetness
- Add the finely grated zest of one lemon or orange for a citrus lift
Fruit scones
FruityFruit scones are the tearoom classic. Currants are traditional, but there is a whole world of fruit to explore. For a glorious summer version, try our peach scones recipe — the fresh fruit adds a juicy sweetness that works beautifully with cream.
- Currant & lemon: ½ cup currants + zest of 1 lemon
- Dried cranberry & orange: ½ cup dried cranberries + zest of 1 orange
- Blueberry: ½ cup fresh or frozen blueberries — fold in gently at the very end
- Date & walnut: ⅓ cup chopped dates + ¼ cup walnuts (increase sugar to 4 tbsp)
- Honey drizzle: Skip the jam and drizzle warm honey over freshly baked scones instead
Savoury scones
SavouryDrop the sugar to 1 teaspoon, skip the currants, and scones become a brilliant bread alternative. If you love the idea of a savoury, potato-based version, the potato scones recipe is a wonderfully hearty Scottish flatbread that pairs perfectly with a cooked breakfast.
- Cheddar & chive: Add ¾ cup grated sharp cheddar + 2 tbsp fresh chives. Scatter extra cheese on top before baking.
- Sun-dried tomato & basil: ¼ cup chopped sun-dried tomatoes + 1 tsp dried basil + pinch of garlic powder
- Herb scones: 1 tbsp fresh rosemary + 1 tbsp thyme — great alongside soup or stew
- Smoked paprika & cheddar: 1 tsp smoked paprika + ½ cup cheddar for a warmly spiced, crowd-pleasing version
Vegan scones
VeganSwapping out the dairy and egg is easier than you think and the results are surprisingly good.
- Butter: Replace with an equal weight of cold vegan butter (block-style works best). Avoid soft spreads — they contain too much water.
- Buttermilk: Mix ⅔ cup unsweetened oat milk or soy milk with 1 tsp apple cider vinegar. Let it sit for 5 minutes to curdle slightly.
- Egg (dough): Skip it — just use the plant milk mixture above.
- Egg wash: Brush with oat milk instead; the scones will be a slightly paler gold.
- Serving: Vegan clotted cream or whipped coconut cream with jam works beautifully.
Gluten-free scones
Gluten-FreeA reliable gluten-free scone does need a couple of tweaks to get right — here is what works:
- Flour: Replace the all-purpose flour 1:1 with a good-quality gluten-free self-raising flour blend (one that already includes xanthan gum). Add an extra ½ tsp baking powder to compensate.
- Rest: Let the shaped scones sit on the tray for 10 minutes before baking — this gives the xanthan gum time to hydrate and improves the rise.
- Texture note: GF scones are best eaten on the day of baking. They can be slightly more crumbly than regular scones, but are just as delicious.
- Check your butter: Most butter is naturally GF, but check labels if you have a severe intolerance.
Chef’s tips
Keep everything cold
Cold butter, cold milk, cold hands. The goal is to keep the fat solid until it hits the oven, where it steams and creates flaky layers. If your kitchen is warm, chill the mixing bowl, the flour — even your hands under cold water.
Handle the dough as little as possible
Less is genuinely more here. The more you work the dough, the more gluten develops, and the tougher and flatter your scones will be. Mix until just combined, then stop.
Press straight down when cutting
Never twist the cutter. Twisting seals the cut edges of the dough together, preventing the classic high rise. Stamp straight down, pull straight up.
Hot oven, quick bake
425°F (220°C) is hot but intentional. A screaming-hot oven sets the outside quickly and creates steam from the butter, pushing the scone upward. A cooler oven bakes a flat, dense result.
1 inch thick — no thinner
Thin scones bake through before they have time to rise. Pat to at least 1 inch (2.5 cm) thickness. If in doubt, go slightly thicker rather than thinner.
Make-ahead option
Cut the scones, arrange on a lined tray, then freeze uncovered for 1 hour. Transfer to a bag and bake from frozen — add 5 minutes to the bake time. Morning scones with zero morning faff.
Storage & reheating
Room temperature
Store in an airtight container or a paper bag. Avoid cling film, which softens the crust.
Freezer (baked)
Cool completely, wrap individually in cling film, then freeze in a bag. Thaw at room temperature or reheat from frozen.
Freezer (unbaked)
Freeze shaped scones on a tray, then bag. Bake from frozen at 425°F (220°C), adding 5–6 extra minutes.
Reheating
Wrap loosely in foil and warm in the oven for 8–10 minutes. Avoids the microwave’s rubbery texture. A dry griddle on low heat also works beautifully.
Beverage pairings
Classic British scones call for classic British pairings. A strong breakfast tea with milk (Assam or English Breakfast) is the timeless choice. For something lighter, an Earl Grey or chamomile works beautifully. If you fancy something cold, a glass of elderflower cordial is wonderfully refreshing alongside a fruit scone.
Frequently asked questions
Why did my scones come out flat?
The most common culprits are: overworked dough (which develops too much gluten), butter that was too warm (it melted into the flour instead of staying in flaky bits), dough patted too thin (less than 1 inch), or egg wash dripped down the sides (which seals the edges). Make sure your oven is fully preheated — if the oven is cool when they go in, they spread rather than rise.
Can I use self-raising flour instead of all-purpose?
Yes — if you use self-raising (self-rising) flour, reduce the baking powder to just 1 teaspoon. Self-raising flour already has leavening built in, so you only need a small extra boost. Too much baking powder can give scones a slightly soapy, metallic flavour.
Buttermilk vs. regular milk — does it really matter?
It makes a noticeable difference but not a deal-breaking one. Buttermilk reacts with the baking powder to create extra lift and gives the crumb a slightly tender, tangy quality. Regular whole milk produces a perfectly good scone — just a touch less airy. If you want to make a quick buttermilk substitute, add 1 tsp white wine vinegar or lemon juice to your milk and let it sit for 5 minutes before using.
Can I make the dough in advance?
You can make, shape, and chill unbaked scones overnight in the fridge — just cover the tray tightly and bake cold straight from the fridge the next morning. Alternatively, freeze them (as above) for up to 3 months. Do not mix the dough too far in advance without chilling, as the leavening will start to activate and you will lose some of the rise.
Cream first or jam first?
The eternal question. The Devonian way is clotted cream first, then a dollop of jam on top — this way the cream acts as a base and the jam sits prettily on top. The Cornish tradition is jam first, then cream. Both are delicious; neither camp will ever be fully convinced. Do whichever feels right and enjoy.
How do I know when my scones are done?
Look for a deep golden-brown top and sides that are just set — they should not look pale. Tap the base of one scone: a hollow sound means they are cooked through. They will also have risen visibly and you may see a clear split around the middle — that is the “fault line” where the fold creates the layers. An underbaked scone will feel doughy inside and have a slightly wet bottom.