
Studies show that 77% of Americans want to eat healthier but struggle with complicated recipes and time constraints. We've curated six delicious recipes that won't keep you chained to the kitchen or compromise your health goals. From a vibrant Mediterranean Chickpea Salad to a mouthwatering Pomegranate Salmon, these dishes prove that nutritious cooking doesn't require culinary expertise. Let's explore how these simple, flavor-packed meals can transform your weekly menu and reignite your passion for home cooking.
Simple Mediterranean Chickpea Salad
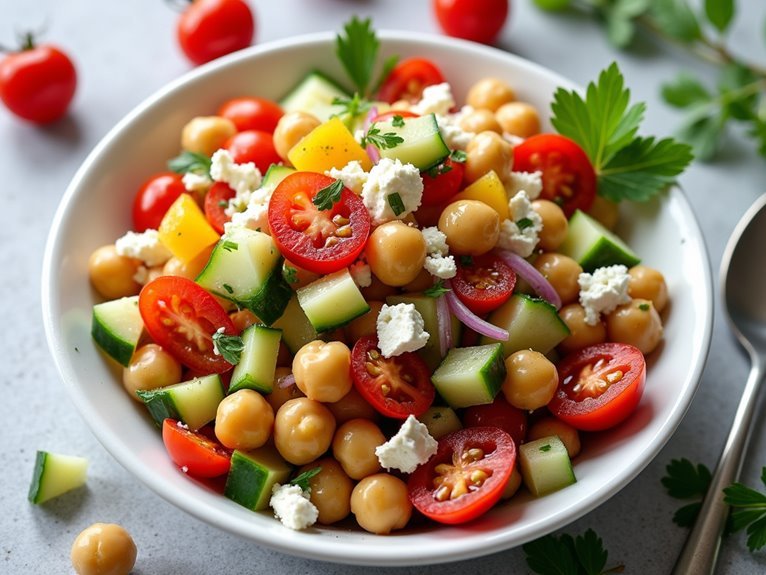
Mediterranean Chickpea Salad is a revitalizing and protein-rich dish that combines the earthy flavors of chickpeas with crisp vegetables and Mediterranean herbs. This versatile salad can be enjoyed year-round and stays fresh in the refrigerator for several days, making it perfect for meal preparation.
The combination of chickpeas, fresh vegetables, and herbs creates a balanced meal that's both satisfying and nutritious. The olive oil-based dressing enhances the natural flavors while adding heart-healthy fats, making this salad a wholesome choice for lunch or dinner.
| Ingredient | Amount |
|---|---|
| Chickpeas (canned) | 2 cans (15 oz each) |
| Cherry tomatoes | 2 cups, halved |
| Cucumber | 1 large, diced |
| Red onion | 1/2 medium, finely chopped |
| Bell pepper | 1 medium, diced |
| Feta cheese | 1/2 cup, crumbled |
| Fresh parsley | 1/2 cup, chopped |
| Olive oil | 1/4 cup |
| Lemon juice | 2 tablespoons |
| Garlic | 2 cloves, minced |
| Salt | 1/2 teaspoon |
| Black pepper | 1/4 teaspoon |
Drain and rinse the chickpeas, then place them in a large mixing bowl. Add the halved cherry tomatoes, diced cucumber, chopped red onion, and diced bell pepper. In a separate small bowl, whisk together olive oil, lemon juice, minced garlic, salt, and black pepper. Pour the dressing over the salad ingredients and toss gently to combine. Add the crumbled feta cheese and chopped parsley, then toss again lightly. Let the salad sit for at least 15 minutes before serving to allow the flavors to meld together.
For best results, use high-quality olive oil and fresh lemon juice rather than bottled. If preparing in advance, add the feta cheese and parsley just before serving to maintain their texture and freshness. Consider soaking the chopped red onion in cold water for 10 minutes before adding to reduce its sharp bite. The salad can be stored in an airtight container in the refrigerator for up to 3 days, though the vegetables may release some liquid over time.
Quick Air Fryer Pomegranate Salmon
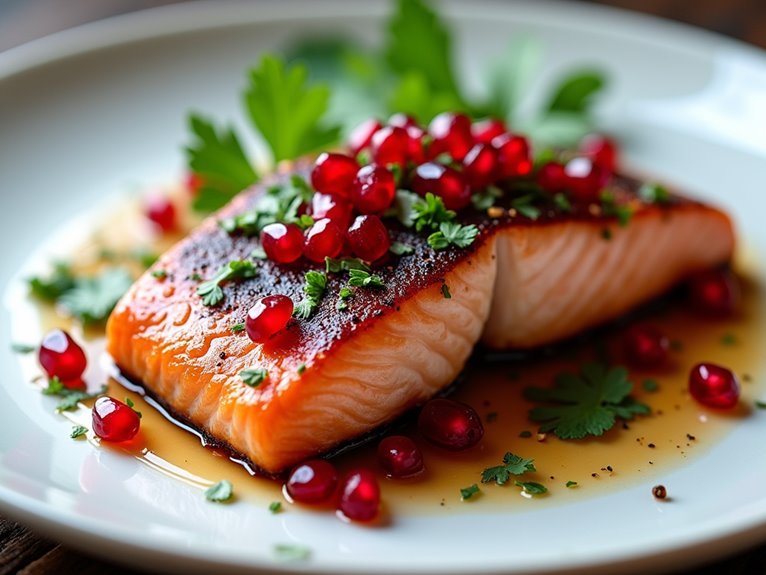
The Air Fryer Pomegranate-Glazed Salmon combines the convenience of air frying with the bold, sweet-tart flavors of pomegranate. This modern cooking method guarantees the salmon stays moist inside while developing a beautiful caramelized exterior, all in about 15-20 minutes.
The dish features a rich pomegranate molasses glaze that coats the salmon, creating a delectable balance of sweet and tangy notes. The fresh pomegranate relish adds brightness, texture, and a mild heat that complements the tender fish perfectly.
| Ingredient | Amount |
|---|---|
| Salmon fillets | 4 (6 oz each) |
| Pomegranate molasses | 1/4 cup |
| Olive oil | 2 tablespoons |
| Fresh pomegranate arils | 1/2 cup |
| Fresh cilantro, chopped | 1/4 cup |
| Serrano chile, minced | 1 small |
| Salt | 1 teaspoon |
| Black pepper | 1/2 teaspoon |
| Garlic powder | 1/2 teaspoon |
Preheat the air fryer to 400°F. Pat salmon fillets dry and season with salt, pepper, and garlic powder. Whisk together pomegranate molasses and olive oil, then brush generously over the salmon. Place the fillets in the air fryer basket skin-side down and cook for 8-10 minutes, or until the salmon is cooked through and flakes easily. While the salmon cooks, combine pomegranate arils, chopped cilantro, and minced serrano chile in a bowl to make the relish. Once the salmon is done, top with the fresh relish before serving.
For best results, verify the salmon fillets are similar in size for even cooking. Don't overcrowd the air fryer basket – cook in batches if necessary. The pomegranate glaze can burn quickly due to its sugar content, so monitor the cooking process carefully. If the glaze starts to darken too quickly, reduce the temperature to 375°F. Let the salmon rest for 3-5 minutes after cooking to allow the juices to redistribute throughout the fish.
Zesty Greek Yogurt Chicken Bowl
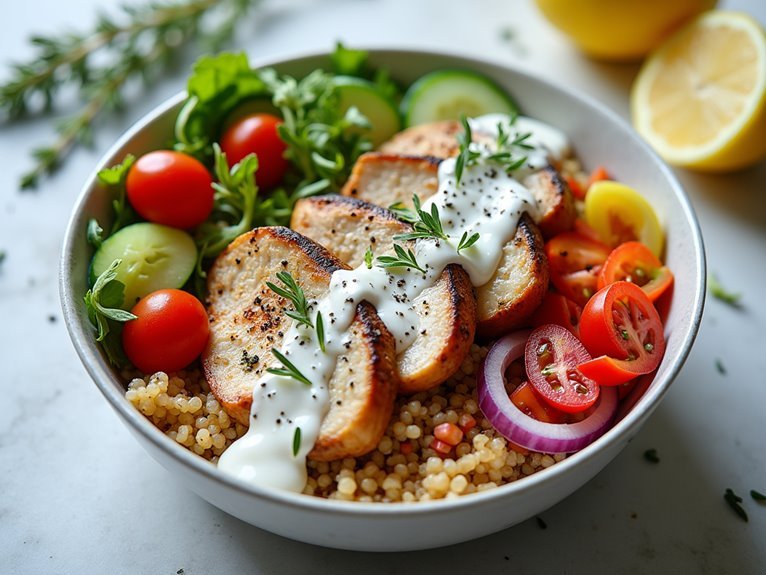
The Zesty Greek Yogurt Chicken Bowl combines Mediterranean flavors with lean protein and fresh vegetables for a nutritious and satisfying meal. The star of this dish is the marinated chicken thighs, which remain juicy and flavorful thanks to a Greek yogurt-based marinade.
This bowl can be assembled in under 30 minutes and offers a perfect balance of protein, complex carbohydrates, and fresh vegetables. The Greek yogurt not only acts as a marinade but also creates a creamy dressing that brings all components together while keeping the dish light and healthy.
| Ingredient | Amount | Notes |
|---|---|---|
| Chicken thighs | 1 pound | Boneless, skinless |
| Greek yogurt | 1 cup | Plain, full-fat |
| Lemon juice | 2 tablespoons | Fresh |
| Garlic | 3 cloves | Minced |
| Quinoa | 1 cup | Uncooked |
| Cucumber | 1 medium | Diced |
| Cherry tomatoes | 1 cup | Halved |
| Red onion | 1/2 | Thinly sliced |
| Bell pepper | 1 | Any color, sliced |
| Olive oil | 2 tablespoons | Extra virgin |
| Oregano | 1 tablespoon | Dried |
| Salt and pepper | To taste |
Mix half the Greek yogurt with lemon juice, garlic, oregano, salt, and pepper to create the marinade. Coat the chicken thighs and refrigerate for 30 minutes to 4 hours. While the chicken marinates, cook quinoa according to package instructions. Preheat grill or pan to medium-high heat. Grill chicken for 6-7 minutes per side until internal temperature reaches 165°F. Let rest for 5 minutes before slicing. Prepare vegetables and arrange in bowls with quinoa and sliced chicken. Mix remaining Greek yogurt with lemon juice and herbs for the dressing. Drizzle over assembled bowls.
For best results, avoid overcooking the chicken thighs as they can become dry. The vegetables can be prepped in advance and stored separately for quick assembly. If meal prepping, keep the dressing separate and add just before serving to maintain freshness. The marinade can be prepared the night before for more intense flavor. For a lower-carb option, substitute the quinoa with cauliflower rice or additional vegetables.
30-Minute Cauliflower Fried Rice
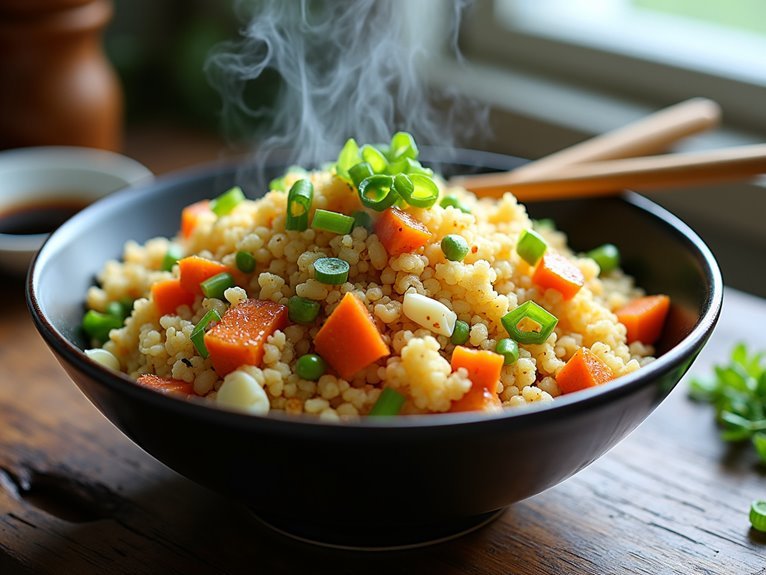
Cauliflower fried rice revolutionizes the classic Asian dish by substituting regular rice with finely chopped cauliflower, creating a low-carb alternative that maintains the beloved flavors of traditional fried rice. This veggie-packed version delivers all the satisfaction of the original while providing additional nutritional benefits.
This quick and versatile dish comes together in just 20 minutes, making it perfect for busy weeknights or meal prep. The key to success lies in properly preparing the cauliflower rice and ensuring all ingredients are ready before cooking, as the process moves quickly once you start.
| Ingredient | Amount |
|---|---|
| Cauliflower head | 1 medium |
| Eggs | 2 large |
| Carrots | 2 medium, diced |
| Frozen peas | 1 cup |
| Garlic | 3 cloves, minced |
| Onion | 1 small, diced |
| Soy sauce | 3 tablespoons |
| Sesame oil | 2 teaspoons |
| Vegetable oil | 2 tablespoons |
| Green onions | 3, sliced |
| Salt and pepper | To taste |
Process the cauliflower in a food processor until rice-sized pieces form. Heat vegetable oil in a large wok or skillet over medium-high heat. Add onion and carrots, cooking for 3-4 minutes until softened. Add garlic and stir for 30 seconds. Push vegetables to one side and scramble eggs in the cleared space. Add cauliflower rice, peas, soy sauce, and sesame oil. Cook for 5-7 minutes, stirring frequently, until cauliflower is tender but not mushy. Season with salt and pepper, then garnish with green onions.
For best results, thoroughly drain the cauliflower rice before cooking to prevent sogginess. Avoid overcrowding the pan, as this can lead to steaming rather than frying. The cauliflower should be dry and the heat high enough to achieve a slight browning effect. For meal prep, you can rice the cauliflower ahead of time and store it in an airtight container for up to 3 days before cooking.
Garlic Shrimp and Chorizo Rice
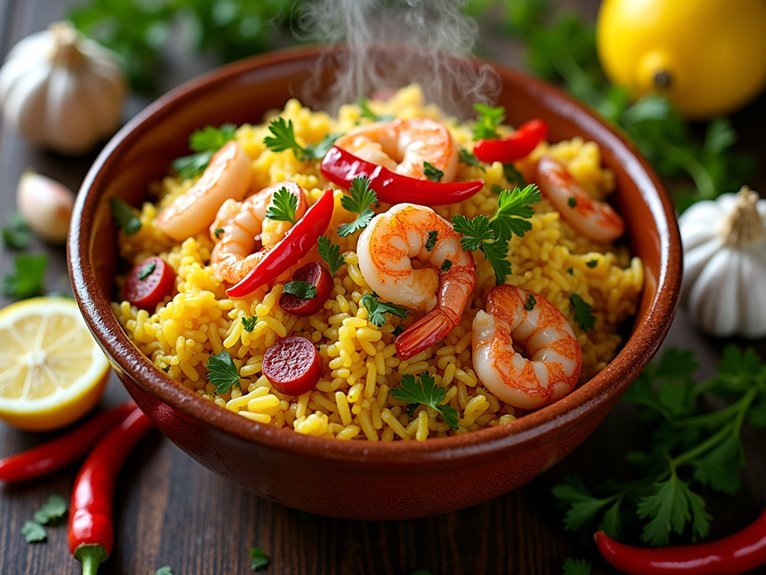
Garlic Shrimp and Chorizo Rice combines the rich flavors of Spanish-style chorizo with succulent jumbo shrimp, creating a satisfying one-pot meal that's both nutritious and flavorful. The dish gets its distinctive taste from the combination of smoky paprika and the natural oils released by the chorizo, while garlic and red peppers add depth and sweetness.
This rice cooker version simplifies the traditional preparation method while maintaining the authentic taste profile. The convenience of using a rice cooker means you can achieve perfectly cooked rice while the other ingredients meld together, creating a harmonious blend of Mediterranean-inspired flavors.
| Ingredient | Amount |
|---|---|
| Jumbo shrimp, peeled and deveined | 1 pound |
| Spanish chorizo, diced | 6 ounces |
| Long-grain white rice | 2 cups |
| Red bell pepper, diced | 1 medium |
| Garlic cloves, minced | 4-5 cloves |
| Chicken broth | 4 cups |
| Smoked paprika | 1 tablespoon |
| Olive oil | 2 tablespoons |
| Fresh lemon | 1 whole |
| Salt and pepper | To taste |
Place olive oil in the rice cooker and set to cook mode. Add diced chorizo and let it release its oils for 2-3 minutes. Add garlic and red peppers, stirring briefly. Add rice, paprika, and chicken broth, then close the lid and let it cook for 15 minutes. When the rice is nearly done, add the shrimp on top and let them steam for 5-7 minutes until pink and fully cooked. Finish with a squeeze of fresh lemon juice and adjust seasoning with salt and pepper before serving.
For best results, avoid stirring the rice during cooking to prevent it from becoming mushy. The shrimp should be added at the end to prevent overcooking, and their size should be consistent to guarantee even cooking. If using frozen shrimp, thaw completely and pat dry before adding to the rice cooker. The chorizo can be substituted with Spanish-style dry-cured chorizo for a more authentic flavor, though Mexican-style fresh chorizo will also work well in this recipe.
Fresh Quinoa Black Bean Stuffed Peppers
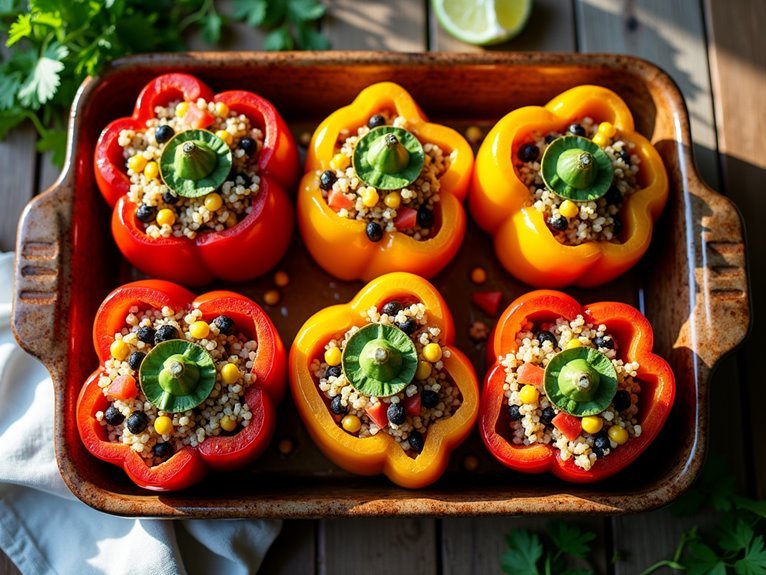
Fresh quinoa and black bean stuffed peppers combine wholesome ingredients into a colorful, nutritious meal that's both satisfying and easy to prepare. The tender bell peppers cradle a flavorful mixture of protein-rich quinoa and black beans, creating a perfect balance of textures and tastes.
This vegetarian-friendly dish delivers essential nutrients while remaining light and invigorating. The quinoa provides complete protein, while black beans add fiber and minerals. Bell peppers contribute vitamin C and antioxidants, making this a well-rounded meal that can be enjoyed any time of the year.
| Ingredient | Amount |
|---|---|
| Bell peppers | 6 large |
| Quinoa | 1 cup |
| Black beans | 1 can (15 oz) |
| Onion | 1 medium |
| Garlic | 3 cloves |
| Diced tomatoes | 1 can (14 oz) |
| Corn | 1 cup |
| Cumin | 1 tablespoon |
| Chili powder | 1 teaspoon |
| Salt | 1 teaspoon |
| Black pepper | ½ teaspoon |
| Olive oil | 2 tablespoons |
Preheat oven to 375°F. Cook quinoa according to package instructions. Meanwhile, cut peppers lengthwise and remove seeds. In a large skillet, sauté onion and garlic in olive oil until translucent. Add cooked quinoa, black beans, corn, tomatoes, and seasonings. Mix well and cook for 5 minutes. Fill each pepper half with the quinoa mixture. Place stuffed peppers in a baking dish, add ¼ cup water to the bottom, cover with foil, and bake for 30-35 minutes. Remove foil and bake for an additional 5 minutes until peppers are tender.
To guarantee the best results, choose peppers that can stand upright and are similar in size for even cooking. The filling can be prepared a day ahead and refrigerated. For meal prep, completely cooked peppers can be frozen for up to 3 months. To add more protein, consider topping with cheese during the final minutes of baking. Adjust spices according to taste preferences, and drain black beans thoroughly to prevent excess moisture in the filling.
Conclusion
We've explored dishes that are both nourishing and delicious, from protein-packed chicken bowls to vibrant Mediterranean salads. Whether you're craving the rich flavors of chorizo rice or the wholesome goodness of stuffed peppers, these recipes prove that healthy eating doesn't mean sacrificing taste. Let's transform our kitchens into spaces where quick preparation meets nutritious innovation, making every meal an opportunity to fuel our bodies and delight our taste buds.