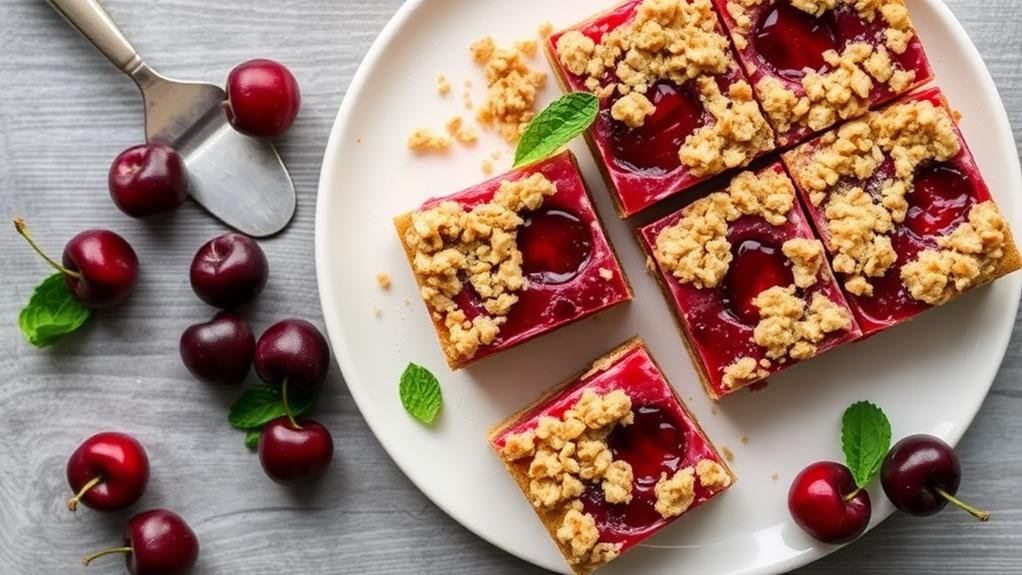
Listen up, folks – these cherry pie bars are just the ticket when you've got a crowd to feed. They're a breeze to make and taste like summer in a pan. I've been baking these for years, and let me tell you, they're a lot less fussy than rolling out a whole pie crust.
You'll get about 24 good-sized bars out of this recipe, and the best part? You only need to spend about 20 minutes actually working on them. The oven does the rest of the heavy lifting. Perfect for when the church social's coming up or when the grandkids are bringing their whole baseball team over.
What I really like about these bars is that you can eat them without a plate or fork – no balancing act needed. Just grab and go. They've got that wonderful buttery crust on the bottom and those juicy cherries on top. Nothing fancy, just good old-fashioned baking that works every time.
Now, if you're thinking these might be too complicated, don't fret. If you can press dough into a pan and open a can of cherry filling, you're already halfway there. Let's get started with making these no-nonsense bars that'll have everyone asking for the recipe.
Recipe

Cherry Pie Bars are a delightful twist on traditional cherry pie, perfect for feeding a large group at potlucks, family gatherings, or holiday celebrations. These portable dessert bars feature a buttery shortbread-style crust, topped with sweet-tart cherry filling and finished with a crumbly streusel topping that adds the perfect texture contrast. The beauty of these bars lies in their simplicity and make-ahead convenience, reminiscent of classic desserts like Peach And Blueberry Cobbler, making them a perfect addition to any dessert table.
While they capture all the beloved flavors of a classic cherry pie, they're easier to serve and transport, and can be cut into various sizes to accommodate different serving needs. The recipe can be made with either fresh or canned cherries, making it a year-round favorite.
Ingredients:
- 3 cups all-purpose flour
- 1 cup granulated sugar
- 1 teaspoon salt
- 1 cup cold butter, cubed
- 2 cans (21 oz each) cherry pie filling
- 1 teaspoon almond extract
- 1/2 cup rolled oats
- 1/4 cup brown sugar
- 1/4 teaspoon cinnamon
- 1/4 cup cold butter, cubed
Preheat oven to 350°F and line a 13×9-inch baking pan with parchment paper. Mix flour, sugar, and salt in a large bowl, then cut in cold butter until mixture resembles coarse crumbs. Reserve 1 cup of mixture for topping, press remaining mixture into prepared pan.
Combine cherry filling with almond extract, spread over crust. Mix reserved crumb mixture with oats, brown sugar, and cinnamon, then sprinkle over cherries. Bake for 45-50 minutes until top is lightly golden and filling bubbles. Cool completely before cutting into bars.
For best results, refrigerate the bars for at least 2 hours before cutting to achieve clean, neat squares. Store bars in an airtight container in the refrigerator for up to 5 days. If using fresh cherries, cook them with sugar and cornstarch first to achieve the proper consistency. The bars can be frozen for up to 3 months when wrapped properly in plastic wrap and aluminum foil.
These cherry pie bars transform the classic American dessert into a portable, crowd-pleasing format. While traditional cherry pie dates back to the 1800s in the United States, this streamlined version delivers the same beloved combination of buttery crust and sweet-tart fruit filling but serves a larger group with less fuss.
The beauty of these bars lies in their versatility – they work equally well at summer picnics, holiday gatherings, or bake sales. Unlike a traditional pie that requires careful slicing and plating, these sturdy squares can be eaten by hand, making them an ideal choice when serving a crowd.
Conclusion
Cherry pie bars are just the ticket when you need something sweet for a crowd – less fussy than a regular pie but every bit as good. The buttery base reminds me of my mother's shortbread, and those cherries on top? Pure heaven. I've made these for church suppers and family reunions, and folks always clear the plate. They travel well too, which makes them perfect for potlucks. Just stack them between wax paper in a tin, and you're good to go. The best part is they're not overly sweet, so you can really taste those cherries. Trust me, once you try these, you'll keep the recipe handy – it's a keeper.

